Wednesday, 10 June 2020

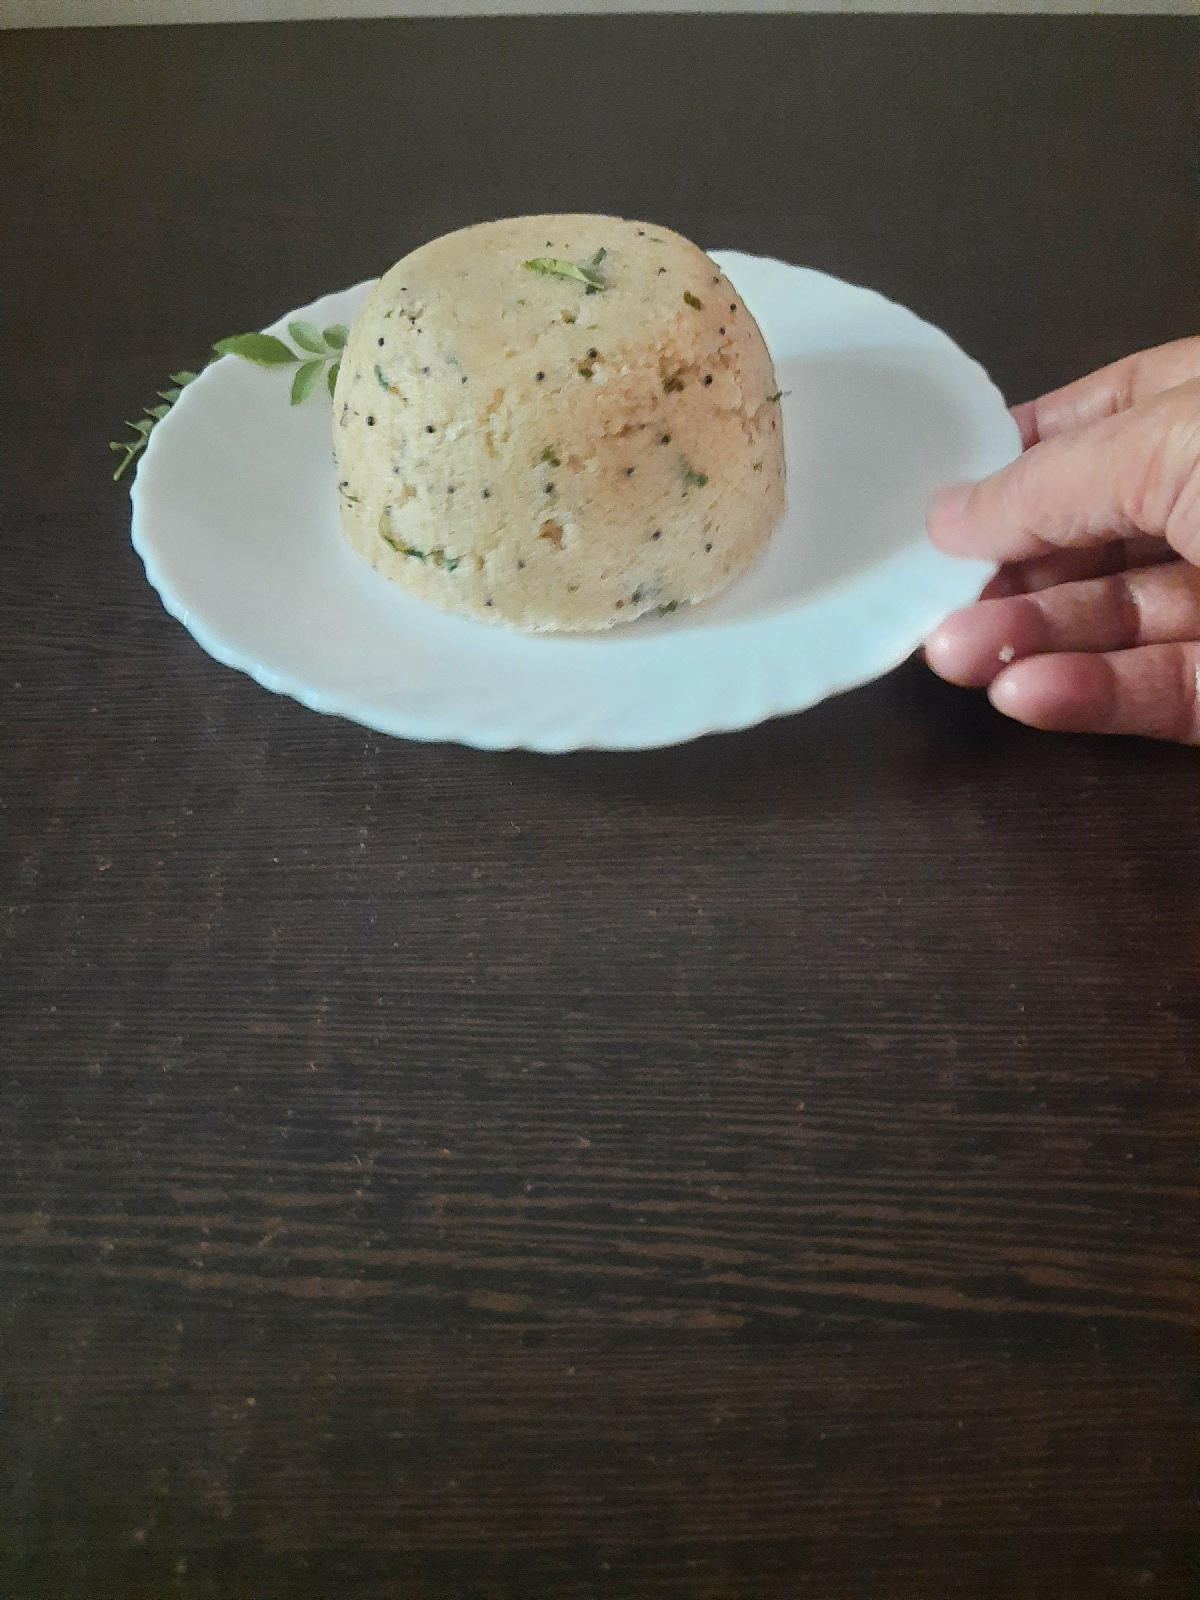
Bottle Gourd Idli / Lauki Ki Idli

Hello friends...
How are you ? I hope you are fit and fine.

Namaskar....

I am Sangeeta Agrawal and heartily welcome you at my food blog.

# Today I am sharing a super healthy and easy recipe of "Idli'...all time favourite food of every one in the family. Because it is a light food to digest and easy to make.

# If you add bottle gourd in idli...it will be more healthy and nutritious. Often our children don't like to eat lauki ( one of the most healthy vegetables ) in daily meal..so you can feed lauki to kids and even to your spouse in this way.

# Let us start the recipe of..
 "Bottle Gourd Idli"


# Cook Time....25 minutes
# Prep Time...10 minutes
# serving...4
# Cuisine... Indian
# Course...At any meal... breakfast, lunch or dinner or as a side dish

# Ingredients For "The Bottle Gourd Idli"

1. Semolina....200 gram
2. Bottle Gourd....250 gram...150 gram puree....half bowl
3. Beated curd....1 bowl...200 gram.
4. Spinach puree...2 Table spoon for a nice colour
5. Salt to taste...1/2 Table spoon
6. Some coriander leaves for garnishing
7. Some Tomatoes slices..( optional )
8. Fruits salt...2 spoon...eno fruit Salt

#  Method Of Making....

#  Firstly,  wash the bottle gourd, Peel its skin and cut it  into thick pieces.


# Transfer these bottle gourd pieces in the pressure cooker to get boil with a cup of water on the high flame.
Take 5 whistles on full flame and off the flame.
Let the pressure down by itself.


# As it cools down... drain out the water of boiled lauki in a soup strainer and let it cool.

Then make the puree of boiled bottle gourd in the mixer jar.

# Prepare a little puree of spinach for a nice natural colour ( palak ) by blanching spinach in the fast boiling water.  You can make required amount of puree of spinach for the " Palak Paneer" or "Palak Besan Paneer Cofta"....and in the next meal....you can use it as I did in this recipe.

# Now keep ready semolina and beated curd.


#  Every thing is ready....so  take a big pan or bowl and add semolina with bottle gourd puree, spinach puree, beated curd and Salt to taste.
Just mix well with a spoon and let it rest for 20 minutes.


# After that...beat the semolina mixture well. If needed you can add 2 spoon water only.

# Get ready the steamer to cook idli.
For this, pour 1 1/2 glass water ( 600 ml.) in the idli cooker and place it on the high flame to boil.

# Meanwhile...Grease the moulds of idli with oil so that idli can be seperated easily after cooking.

As the water starts boiling...just add 1 1/2 spoon eno fruit  ( more than 1 packet eno ) Salt in the idli batter with a spoon of water to activate it fastly.

# pour the idli batter in the moulds of idl stand with the help of a spoon

Tap the idli stand with light hands to even the batter.


# you can place a thin slices of tomatoes in the upper or lower side of few idlis for making it more tempting.

# Let the idli cook on the full high flame for 13 minutes and cook more 13 minutes on the medium flame till soft and fluffy.
It will take 10 minutes extra to cook than the normal semolina idli..
because we have added vegetables.


# Just check the idli inserting a knife ..if it is clean then idli is cooked or if it is not clean then  let it cook for minutes more.


# Off the flame and let it cool down for 5 minutes and then seperate it with your hands or with a clean knife.

In this way, "Bottle Gourd Idli"is ready to enjoy.

Just serve it with hot Sambhar or you can fry it with chopped onions, tomatoes, green chillies etc.


# Things To Consider..

1. In this recipe...you can add the tadka of mustard seeds, Curry' leaves with chana and urad dal in the idli batter as choice.
But mostly children don't like its bites so adjust accordingly.

2. The idli batter should be little thick and beated well...it helps in making idli fluffy.

3. This "Lauki Idli" takes more time to cook than normal idli. 
In the starting...you will feel that it is little sticky but as it cools down...it is amazing.
so have patience but the results are fine, delicious and healthy.

# Garnish very thin tomatoes slices without its juice over the idli...it will help in maintaining the shape of idli and cook well.

# For seperating idli easily...just take cold water in a bowl from the refrigerator...dip your fingers in it....and seperate the hot  idlis with wet hands.
Without sticking in the Idli stand..you can seperate it comfortably.


Thanku Friends...for liking my recipes and appreciation.
Just leave your valuable feedback in the comment box...it will help me in growing and others viewers too.

Please like, share and subscribe my articles.

Thanks again for your concern.


Monday, 8 June 2020

Upma Recipe / Suji ka Namkeen Halwa In North Indian Style

Hello friends,

# How are you ? I hope that you all my friends and viewers are fine and healthy.

Namaskar....

# I am Sangeeta Agrawal and heartily welcome you at my food blog.

# Today I am sharing a healthy and quick breakfast recipe of plain "Upma".  Mostly People and specially children like to eat it Plain.


# This is the basic recipe in a proper and healthy way as my mother used to make for me.

# Plain upma can be served... kids to old  members of your family.  It is very light food to serve for patients even.

# You can enjoy it at any meal as a filling and light food.
It also goes well in the evening tea time as one of the healthy options.

# It is known in North India by the name of "Suji Ka Namkeen Halwa". 

#  Upma is actually a 'South Indian Dish" but is relished and preferred all over India due to its healthy and instant properties.

# Let us start the recipe of "Upma" in North Indian Style..

# No preparation
# Cook Time....20 minutes
# Cuisine.... Indian
# Course... Breakfast recipe / evening Tea Time / Filling and healthy.

#  Ingredients For "Upma"

1. Semolina...150 gram / 1 small bowl
2. Water....600 ml. / 4 bowl 
3. Oil or ghee...3 Table spoon
4. Mustard seeds...1 Tea spoon
5. Curry leaves...15
6. Salt to taste...1/2 Tea spoon
7. Chopped green chillies...2
8. Coriander leaves...2 Table spoon


#  Firstly,  on the flame and add oil in a kadhai on the medium flame, as the oil heats up, add mustard seeds to crackle along with curry leaves to sizzle.

Then add semolina / suji and start roasting it on the slow flame till a nice brown colour and aroma.


# Keep on stirring semolina on the slow flame in the intervals of 2 minutes if needed.
The whole taste of upma ( Namkeen suji ka halwa ) depends upon its fine roasting.

# The total roasting of semolina will take 15 to 20 minutes. As you find it well roasted....just place a pan with measured water on the other flame. Just make the water luke warm and off the flame.
Add salt in this water and mix it with a spoon.
Adding of luck warm water brings a nice taste and helps semolina in fast cooking.

# Now semolina is well roasted...set the flame on high and immediately add water in it.


# Mix it well on the full high flame. Add a little chopped green chillies and coriander leaves.


# Just cover the kadhai for 2 minutes to avoid burning from hot drops.
As halwa absorbs water...just open it and stir it fastly.


# Now you will find that halwa is seperating the sides of kadhai...it is the sign that semolina halwa is ready to serve.
Add few drops of desi ghee and stir it again.
This step makes the halwa shiny and non sticky.
In restaurants and hotels, they add a little thick curd to make it soft.


# In this way, Delicious and healthy "Upma" is ready to enjoy.

# Things To Consider...

1. You can make veg upma by adding your favourite veggies.
After roasting the semolina ...take out it in a plate. Then cook the veggies till soft. Add roasted suji with warm measured water and stir it fastly on the high flame.

2. For making semolina halwa either salty or sweet.. measured water brings perfect results.
Just remember...4 times more water.

3. Usually, people add normal cold water in making halwa...but if you use luke warm water...it makes hawa more delicious, non sticky and helps in fast cooking.

4. You can add 1 spoon urad and chana dal after crackling mustard seeds...it tastes good but children and some family members don't like its bites.
Do accordingly, adjust.

Roasted cashews can be added in this recipe as choice.

Thanku Friends...

I am much happy to know that you like my recipes... please give your feedback through comments and like, share and subscribe it.

Thanks again.

.


Friday, 5 June 2020

Capsicum And Potato Curry / Shimla Mirch Aur Aloo Ki Raseeli sabji

Hello friends,
Nameste....

#  How are you ? Hope,  you all are fit and  fine.

#  I am Sangeeta Agrawal and heartily welcome you at my food blog.

#  Today I am sharing a super easy and delicious recipe of "Capsicum And Potato Gravy Curry". Usually we make Aloo Tamater, Aloo Mater in our daily meal...so for a delicious change....just try this tasty Curry of 'Shimla Mirch and potatoes"in less spices and less oil.

#  You will get delighted if you have it once. You can enjoy it with chapattis, paratha and rice too.


# Prep Time...10 minutes
# Cook Time...25 minutes
# Serving...4 person
# Cuisine... Indian
# Course.... Main

#  Ingredients For The "Capsicum And Potato Gravy Curry"

1. Capsicums...250 gram
2. Tomatoes....250 gram
3. Potatoes...150 gram
4. Green chillies...2
5. Ginger....1/2 inch
6. Cumin seeds...2/2 Tea spoon
7. Pinch of asafoetida
8. Kasoori methi...1 Tea spoon
9. Turmeric powder...3/4 Tea spoon
10. Coriander powder...1 Tea spoon
11. Red chillie powder...1/2 Tea spoon...( Kashmiri or degi mirch )
12. Salt to taste....3/4 Table spoon
13. Garam masala...1/2 Tea spoon
14. Dry mango powder....1/2 Tea spoon
15. Coriander leaves....2; Table spoon
16. Oil or ghee....4 Table spoon

#  Method Of Making...

# Keep everything ready.
 Firstly, wash the capsicums, potatoes and tomatoes well.
Chop the even pieces of capsicums in squares.
Chop the pieces of potatoes and dip them in the water to avoid from turning black.
Make a puree of tomatoes with green chillies and ginger.
Keep them aside.

# On the flame and place a kadhai with oil. As the oil heats up, add the pieces of capsicums and fry them on the slow flame.
Cover it and stir it for 2 minutes intervals and cook it till 80 percent soft.
It will take 8 minutes.
 Then...put all the pieces of capsicums aside the kadhai to release extra oil.

Take out the fried capsicums in a plate.

# Now in the same oil...add the pieces of potatoes and fry them till 50 percent soft.
Repeat the same process of releasing oil like the capsicums.
Take out in a plate.

# Then place the pressure cooker with 2 spoon oil on the medium flame.
As the oil heats up...add cumin seeds and asafoetida to crackle.
Add kasoori methi and saute it for a fine taste and aroma.
Add turmeric powder, coriander powder and kashmiri chillie powder with tomatoes puree.
Saute it and add salt to cook it faster.

# Just cook it til the tomatoes gravy seperates oil.
It will take 8 minutes more.

# Finally,  add fried potatoes with 300 ml.water and cook it on the high flame till one whistle and 5 minutes more on the slow flame.

# Let it pressure down by itself.
Open the lid..add fried capsicums, garam masala and amchur powder.
 Now... either cook the curry openly to absorb all the taste of spices and tomatoes in capsicums... for 2 minutes  or cover the pressure cooker for a minute on high flame.
Just off the flame.

# Lastly, Add coriander leaves and mix well.
In this way,  "Delicious Shimla Mirch Aur Potatoes Gravy Curry" is ready to enjoy.


Thanku Friends
Thanks again.

I am very happy to know that you are liking my articles and recipes.

Please give your valuable feedback through your comments.

I would feel more confident and motivate to write.


Monday, 1 June 2020

Sweet And Sour Mango Pickle ( Aam ka Metha Achar ) Dhoop ( Sun ) Cooked..No Oil, No Cooking...

Hello friends,
Namaskar...

# I am Sangeeta Agrawal and heartily welcome you at my food blog.

# During this summer season... we have already made "Asafoetida and Mango pickle" and "Dry Mango Pickle"
Today we will make the "Sweet Pickle of Raw Mangoes". 

# "Sweet Mango Pickle" ( Aam Ka Metha Achar )  is cooked in 2 ways...either you can make it on fire instantly or in the sun light ( Dhoop mein paka ).
Now a days....there is a scorching heat...so we can take its benefit by cooking our mango pickle in the sun.

# The speciality of this pickle is that it can go long more than a year.  You need no oil no cooking.
The other side is that it takes time to make 8 to 12 days depending upon the sun light.
In this recipe...I have made it in 8 days because I have much sunlight at my home.

# This pickle is super delicious and healthy. You need very few ingredients and spices. It is liked by everyone specially by children for its sweet and less spicy taste.

# Pickles not only enhances the taste of our food but also improves the digestion.
It tastes best with chapattis, Parantha, mathri, poori, rice etc.
Children just eat it plain because it is so.. yummy. You can place it in the lunch box of school going kids.

# Let us start the recipe of "Sweet And Sour Mango Pickle"


# Prep Time....15 minutes
# Cooking Time...8 to 12 days
# Cuisine... Indian
# Course... Pickle..side dish

# Ingredients For The Pickle..

1. Raw Mangoes...500 gram
2. Sugar or jaggery....300 gram
3. Sendha salt....1 Table spoon
4. Turmeric powder...1 Tea spoon
5. Roasted cumin powder....2 Table spoon
6. Fennel seeds powder...2 Table spoon ( saunf... coarsely grounded
7. Black Salt....1 Tea spoon
8. Garam masala...1 Tea spoon
9. Red chilli powder...1/2 Tea spoon
10. Black Pepper...1/2 Tea spoon ( grounded )
11. Pinch of asafoetida

#  Method Of Making...

1. Wash the "Raw Mangoes" very well in water and let it dip for two hours in the water....do that it could release it's heat.
(An important step.... followed by our mom and grandma...it makes pickle more healthy and delicious )


2. Then wipe them with a clean cloth and let it dry for minutes.

3 After that....peel the skin of mangoes and cut its medium size slices and seperate its seeds and keep aside.


4. Put the pieces in a glass container and add 1 table spoon Sendha salt and turmeric powder...mix it and place it in the sun light ( Dhoop ) for 4 or 5 days as required till soft.  Either Cover it with a thin cloth or its lid so that it could remain safe from any dust etc.


5. Toss or stir it daily 3 times. It will fasten the process of cooking from all sides till soft.

6. As it becomes soft... Just add sugar or crushed jaggery or half sugar and half jaggery as choice.
Add half quantity of spices in the pickle with sugar...so that it will create flavour in the pickle while cooking.
Again place it in the sun light till a nice thick sugar syrup.


7. After 4 to 6 days,  you will find it well cooked and delicious.

Now again add...rest half spices in the pickle along with s pinch of asafoetida.
Mix it well and transfer it in a dry sterilized food jar.


8. In this way, "Sweet And Sour Mango Pickle" is ready to enjoy.


# Things To Consider...

1. For making any type of  Sweet mango pickle...you can take a sweet variety of mangoes. It takes little sugar.
Otherwise " Kela Aam" ( Gola aam ) is called the best mangoes for making all types of pickles.

2. You can add more or less spices as your taste like red chilli powder etc.

# After cutting the slices of Raw Mangoes.... don't throw its seeds...just place it in the pressure cooker with 1 glass water. Let it boil till a whistle and 5 minutes more.
You can make a delicious and nutritious "Aam panna" by mashing and adding a little sugar, salt, roasted cumin powder, mint powder etc.

Friends....I have just joined  "You Tube".. please visit at my channel if you like my Recipes.....

https://youtu.be/OVkKYyUYf5I

Thanku Friends,
Thanks again.


Saturday, 30 May 2020

Capsicum Tomato Instant Masala Curry / Shimla Mirch Aur Tamater Ki Jhatpat Sabji

Hello friends,
Namastey....

# I am Sangeeta Agrawal and heartily welcome you at my food blog.

# Today we will make an instant healthy recipe of Shimla Mirch and tomatoes..
"Capsicum Tomatoe Masala Curry'

# Eating capsicums speeds up the metabolism and helps burn more calories. It reduces weight gained due to a high fat diet. Capsicums are an excellent source of vitamin C and A. It improves eye sight and helps in digestion.

# Natural sweetness of capsicums and little sourness of tomatoes brings this curry an amazing taste.

# Let us start the recipe of "Capsicum Tomato Masala Curry'.


# Prep Time...10 minutes
# Cook Time...10 minutes
# Person...2
# Cuisine.... Indian
# Course...Side dish...dry curry

# Ingredients For The Recipe Of...."Capsicums Tomatoes Masala Curry"

1. Capsicums....250 gram...3
2.Tomatoes....200 gram...6
3. Green chillies....2
4. Ginger.....1/2 inch
5. Oil or ghee...2 to 3 Table spoon
6. Cumin seeds...1/4 Tea spoon
7. Pinch of asafoetida
8. Turmeric powder....3/4 Tea spoon
9. Red chillie powder...2 pinch
10. Garam masala....2 pinch
11. Salt to taste...1 Tea spoon
11. Lemon juice... Half lemon
12. Coriander leaves...2 Table spoon

# Method Of Making....

# Firstly wash capsicums and tomatoes well in the water. Keep aside.
Then chopp the capsicums and 3 tomatoes in cubes evenly, Keep ready like the following picture.

Then place a kadhai on the medium flame....just add oil. As the oil heats up...add chopped capsicums along with  little salt and turmeric powder...saute and fry them till 80 percent soft.


For this, saute capsicum cubes for 2 minutes and cover a lid to cook.
After 2 minutes...open the lid and saute again.
Repeat this process 3 times for 2 minutes likewise.
Meanwhile, keep ready other rest tomatoes, green chillies and ginger by making its coarse gravy...not its paste.
I have crushed the tomatoes in the following magic chopper.
Tiny chunks of green chillies, ginger and tomatoes bring a nice texture and taste.

 
As the cubes of Shimla Mirch get fried. Off the flame.
just put the fried cubes of capsicums aside the kadhai...so that it could release its oil.
Like the following picture..


Just Cover the pan for 2 minutes...it will fasten the process of releasing the extra oil.

Just see the following picture... oil is seperated.


Take out the Fried Green capsicums in a plate.
Now... on the flame and heat  the same oil...as the oil heats up....add cumin seeds, pinch of asafoetida and turmeric powder.
Saute it and immediately add crushed puree of tomatoes, green chillies and ginger.
Mix it well and cover the pan to cook.
Cover it for 2 minutes on slow flame.
As the tomatoes gravy is cooked and has become shiny...means seperating a little oil again. It is done.

Add 50 ml. water in the gravy. Make it boil on the medium high flame.
Just add fried capsicums and chopped cubes of tomatoes.
Saute the curry for a minute.
Add garam masala, red chillie powder, lemon juice and chopped coriander leaves.
Mix it well. Off the flame.
Capsicum Tomatoe Masala Curry is ready to enjoy.

Serve it with a slice of a lemon and green chillie.

In this way, you can make this delicious and healthy recipe instantly with less oil and less home ingredients.

# Things to consider

1. You can make this curry adding sweet corn, paneer and other veggies as choice.

2. If you like more crunchy taste of capsicums...then fry and cook the shimla mirch cubes till 50 percent only.
But 80 percent cooking helps in better digestion.

3. You can add coarsely grounded peanuts ( moongfali ) in this curry at the final stage.
It will taste nice like South Style.

4. You can serve this curry as starter.

5. You can add chopped green chillies and ginger at the time of last cooking as taste.

Thanku Friends,
Thanks again.


Thursday, 28 May 2020

Green Chillies Fry / Fried Mirch Pickle / Chukki Hari Mirch / Instant Mirch Fry

friends,
Namaskar....

#  I am Sangeeta Agrawal and heartily welcome you at my food blog.

#  Today's recipe is "Green Chillies Fry". It is called "Bhuni or Chukki Mirch" in North India. It is an "Instant Mirch Fry".. a tangy, spicy and crispy recipe that is  loved by people at any meal.

Its few bites enhances the taste of food.

# Prep Time....10 minutes
# Cook time...8 minutes
# Person...10 to 12

# Let us start the recipe of "Green Chillies Fry"....

#  Ingredients for the recipe...

1. Green chillies....110 gram
2. Cumin seeds....1/4 Tea spoon
3. Asafoetida...1/4 Tea spoon
4. Turmeric powder....1/2 Tea spoon
5. Fenugreek powder ...1/2 Tea spoon
6. Coriander powder...1 Table spoon
7. Fennel ( saunf ) powder....2 Table spoon
8. Dry mango powder......1 Table spoon
9. Salt to taste or 3/4 Table spoon
10. Mustard oil....4 Table spoon


# Method Of Making....

1. Wash the green chillies well in an open water.  Wipe them with a clean cloth and let it dry completely under the fan for some time....the purpose is to make them moisture less.

2. Then cut the green chillies into two parts in middle.
You can chop its small pieces as whole.
Also can remain it as whole Chilli slitting in middle as choice.
I have cut it like the following picture.

3. Place a kadhai with oil on the medium flame.
As the oil heats up...just add cumin seeds and asafoetida to crackle along with turmeric powder for a nice texture.

4. Add chopped green chillies in it and saute it and fry them well for 4 minutes.

5. As you see them roasted and crispy....just add other spices along with salt, coriander powder, saunf powder, amchur powder, methi powder etc.
Mix well for 2 minutes.
Off the flame and let it sit for 4 minutes in kadhai covering its lid.

Thus step will make green chillies little soft and delicious.

After that, take out the "Fried Green Chillies" in a plate or container.

In this way, "Chukki Hari Mirch"  or "Instant Mirch Fry' is ready to enjoy.


#  Note....

1. While cutting the green chillies...if you cut its both ends a little...it will increase its self life.
It is an important tip.

2.  If you mix other spices like coriander powder, saunf powder, Methi powder, amchur powder etc.after frying the green chillies....it will maintain its taste, nutrients, flavour and nice texture.

3. Again, the step of  green chillies sit in the steam of hot kadhai...will bring a nice cooked flavour and texture.

4. After transferring in the refrigerator, you can eat these fried green chillies for 10 days.

Thanku Friends,
Thanks again.