Friday 31 August 2018

Instant Gola ( Coconut ) Burfi Without Mawa


Hello friends,
Namaskar...
# I am sangeeta Agrawal and heartily welcome You may my blog.
Friends, now "Janmashtami " ( birthday of Krishna ) is about to come. So all of us are thinking to prepare sweets for the bhog of Kanha.
# Traditionally we prepare many sweet dishes on this festival as ...Mingi Burfi, kutu Mawa Burfi, Panjiri Pak and Gola burfi or pak.
# Today I am sharing a very simple recipe of Coconut Burfi that you can prepare with your home ingredients only.
# Ingredients For Coconut Burfi..
1. Dry Coconut....1 big size ( peeled and grated )
2.  Milk.....200 gram
3. Powder sugar.....100 gram
4. Deshi ghee....2 small spoon
5. Green cardamom powder...1|2 tea spoon.
6. Chopped almonds and pistachios..2 table spoon.
#  Method Of Making..
1. First wash and peel the black skin of coconut.
2. Then grate it in the grater and grind it in the mixer jar.
3. Now heat a heavy bottomed wok |  kadai with 1 small spoon ghee.
Roast the coconut powder and  take out in a plate.
4. Then add again 1 small spoon ghee in the same kadai with the milk.
Stir it well for 3 minutes.
5. Now add coconut powder.
Mix and stir it well
Cook it,  till the coconut absorbs the whole milk.
Carefully stir it by covering half with a plate.
It will take 5 minutes.
6. Then add powder sugar and cardamom powder in the mixture and stir it continuously otherwise it can stick to the bottom due to the moisture of sugar.
Stir it well till it comes at the solidifying consistency of burfi.
It will take 7 minutes.
7. Now transfer it in the greased plate.
Level it with the back of a greased spatula or halwa plate because it is too hot.
8. Garnish it with chopped nuts.
Let it come to the room temperature then transfer it in the refrigerator for better consistency.
After few hours cut it in the shape of your choice.
In this way...Delicious coconut pak is ready to enjoy.
Note....
1. For making this burfi more easy....
Grind the coconut powder with milk in the mixer jar, then add ghee in the kadai and transfer the mixture and prepare the burfi with the same method.
2. For peeling the black skin of coconut easily, soak in the normal water for some time.
3. In place of grated coconut, you can take dessicated coconut from the market.
Thanku friends,
If you like my recipe then like and share it.
Thanks again.


Thursday 30 August 2018

Black Chickpeas ( kala chana Masala ) Curry ...Without Onion Abd Garlic

Hello friends,
Namaskar...
I am Sangeeta Agrawal and heartily welcome you at my blog....
#Friends, Black chickpeas have been a part of the Indian diet for a long time. It is also known as Bengal grams, Garbanzo beans or Kala desi chana.
#  Black chana curry is low in fat, high in dietary fibre and rich in vitamins and minerals.
# Usually we use black chickpeas for salads, soups, and as quick snacks in the breakfast.
# But today we will make its delicious and healthy curry with no onion and garlic.
For making the thick gravy...We will mix some mashed chana in the curry.
You can enjoy it with chapati and rice both.
# Prep Time....15 minutes
# Soak Time....10 hours or overnight
# Cook Time...45 minutes
# Serving....4
# Ingredients For The Kala Chana Masala Curry...
1. Black chickpeas....150 gram ( soaked )
2. Tomatoes.....3
3. Green chili....2
4. Ginger......1 inch piece
5. Deshi ghee | oil....2 1|2 table spoon
6. Whole spices...2 bay leaf, 1 inch cinnamon stick, 2 black cardamom, 8 crushed black pepper and 4 cloves.
7. Cumin seeds...1|2 tea spoon
8. Pinch of asafoetida
9. Coriander powder...1 table spoon
10. Red chili powder...1|2 tea spoon
11. Garam masala...1 tea spoon
12. Chopped coriander...1 table spoon
13. Salt to taste
14. 1 lemon juice
#  Method Of Making "Black Chickpeas Curry".....
# For The Pressure Cooking....
1. Wash the black chana properly in an open water till the water comes clear.
Soak it for 10 hours or better overnight in sufficient water because after soaking chanas become enlarge in size.
2. Then add these soaked chana along with its healthy water in the pressure cooker with 1 tea spoon salt and 1|4 tea spoon baking soda.
Add water as required.
The perfect ratio of water should be 1 inch above to the soaked chana.
3. Pressure cook it on the high flame till 2 whistles.Then sim the flame and cook it for 15 minutes.
Let the pressure go down by itself.
4. Now check and stir it.
Then cook it again for 10 minutes.
For, these black chickpeas take much more time to cook than kabuli chole chana.
This stirring of chana after 15 minutes take less time in next cooking of chana.
5. As you find the chickpeas soft by pressing it with thumb and finger, now they are perfect for making the curry.
# Method Of Making Chickpeas Curry..
1. Firstly,  make the puree of tomatoes, ginger and green chili in the mixer jar.
2. Heat ghee or oil in a wok.
Add cumin seeds and asafoetida to
crackle.
Add all whole spices and saute it.
Now add tomato puree with coriander powder, red chili powder and 1 tea spoon salt or as taste.
3. Mix it well with whole spices.
Cover it and cook it till oil seperates  from the tomato gravy from all sides.
4. Now take out 1|4 cup boiled chana from the pressure cooker and keep aside.
And add the rest of chana in the gravy along with its water.
5.  Mix well in the gravy and cook for 5 minutes on the medium heat.
6. Now mash the separated chana coarsely and add in the curry.
Mix well and add some water as required.
The purpose is to prepare the gravy of thick consistency without adding anything extra.
It brings to curry a very luscious original taste.
7.After adding mashed chana, cook it for 5 minutes more.
8. Lastly add garam masala in the curry and cook for a minute.
Then add fresh chopped coriander and lemon juice and off the flame.
You can add tadka ( chonka ) in the curry as your choice.
For Tadka or Tempering The Curry...
# Heat a tadka pan with 1 table spoon oil or deshi ghee.  Add cumin seeds to crackle and off the flame.
Let it cool for a little to prevent burning of red chili .
Now add 1|4 tea spoon red chili powder and 2 slit green chili in the tadka and just transfer it in the curry.
In this way....Super tasty and healthy black chickpeas curry is ready to serve.
Enjoy it hot with rice and chapati.
Note...
1. Soak the kala chana in sufficient less water. It helps in fast cooking.
2. You can discard the soaking water of chana.
But the water of proper washed chana is healthy and takes less time in cooking.
3. You can skip the adding of baking soda in black chana at the time of boiling in the pressure cooker like Punjabi style....
But it will take at least 1 hour to cook ot to make chana soft.
Thanku friends,
If you like my recipe... Please share your experience with me.
Thanks again.

Wednesday 29 August 2018

Cutlets Curry ( Cutlets ki sabji ) Without onion and Garlic

Hello friends,
I am sangeeta Agrawal and heartily welcome you at my blog.
Friends, often we prepare cutlets for the breakfast or at the evening  tea time.
But if we prepare some extra cutlets, then we can prepare its very tasty curry also.
Cutlets curry tastes very yum.
I specially make cutlets  for the curry and enjoy it with my family.
You need only bread and potato for it.That is  always available at your home.
# Prep Time...15 minutes
# Cook Time....30 minutes
# Serving....2 or 3
#  Ingredients For The Cutlets Curry
For The Cutlets...
1. Bread piece....3
2. Boiled Potato...1
3. Salt to taste or 1|4 tea spoon
4. Black pepper...1|4 tea spoon
3. Deshi ghee or oil for frying cutlets
For The Gravy..
1. Tomato...3
2. Ginger...1 inch piece
3. Green chili..2
4. Ghee | oil...2 table spoon
5. Fresh cream...3 table spoon
6. Milk....100 ml.
7. Cumin seeds...1| 2 tea spoon
8. Pinch of asafoetida
9. Coriander powder...1 tea spoon
10. Turmeric powder...1|2 tea spoon
11. Red chili powder...1|2 tea spoon
12. Garam masala...1|2 Tea spoon
13. Tomato sauce....1 table spoon
14.chopped fresh coriander..1 table spoon
15. Water...200 ml or as required
16. Salt to taste
# Method of Making Cutlets.
1. Cut the red corners of bread. Then add a little salt in some water. Just dip the bread in this water and squeeze out the water of bread completely. Keep aside.
2. Grate the boiled potato.
Now mix well the squeezed bread and grated potato with a little salt and black pepper and make a dough of it.
3. Grease your hands and prepare finger size rolls from the dough of cutlets.
Transfer them in the refrigerator for 20 minutes.
By doing so, cutlets will not crack at the time of frying and you don't need them wrapping in the corn flour.
#  Method Of Making Gravy For The  Cutlets Curry..
1. Firstly, Make a paste of  tomatoes, ginger and green chili in the mixer jar.
2.  Now heat a pan or kadai with ghee or oil.
Add cumin seeds and asafoetida to crackle.
3. Then add turmeric powder, coriander powder and red chili powder.
While sauting it, add tomato paste.
Stir it well.
Cover and cook it till oil seperates from the sides of pan.
4. Now add fresh cream and stir it continuously till it mixes well.
5. Add milk and cook for 5 minutes.
6. Now add water and salt.
Cook it 5 minutes more.
The consistency of gravy should be semi thick.
Because cutlets will absorb much water after dipping in the gravy.
7. Lastly add tomato sauce, chopped coriander and garam masala.
Now cook it for 2 minutes and off the flame.
Cutlets gravy is ready.
Cover and keep aside.
8. Now take out the cutlets in the refrigerator.
Heat a pan with ghee or oil
Fry the cutlets on the high flame. Otherwise they will absorb the oil.
As they become golden brown from the one side, then flip them on the other side.
By doing so...The cutlets will neither crack nor stick to the bottom of kadai.
After that fry them on the medium slow flame as the last frying of cutlets.
Total frying will take 10 minutes only.
9. Take out the all cutlets in a plate or bowl.
Now gravy and cutlets both are ready.
Add the cutlets in the hot gravy, just before 5 or 7 minutes only before serving.
In this way....Delicious cutlet curry is ready to enjoy.
Note....
1. You can add paneer in the cutlets.
2. While frying,  just check 1 cutlet..If it is splattering then wrap the cutlets in the corn flour.
3. The perfect ratio is...3 bread + 1 boiled potato. As you need more cutlet rolls for the curry then add accordingly
4. As the cutlets absorb much gravy like cofta curry...So adjust the gravy by adding hot water.
Thanku Friends,
If you like my recipe..Then subscribe it.
Thanks again.


Monday 27 August 2018

Market Style Khasta Kachori ( Crispy Dal Pie )

Hello friends,
Namaskar..
I am sangeeta Agrawal and heartily welcome you at my blog...."Ma ki rasoi"
Friends, khasta kachori is a North Indian dish. people like it very much due to its crispy and soft taste. Often on the festivals or for a change, it is enjoyed.
You can also make it at home any time by following simple tips at the time of kneading, filling and frying.
# Prep Time....20 minutes
# Soak Time...2 hours in normal water and half an hour in hot water.
# Total Cook Time...40 minutes
#. Serving...3 or 4 person
# Ingredients For Khasta Kachori..
# For The Dough of Khasta Kachori
1.All purpose Flour...300 gram ( maida )
2. Deshi ghee or oil....70 gram for moen
3. Baking soda...1 pinch
4. Salt to taste
5. Deshi ghee or oil for frying kachoris
#  For the stuffing
1. Urad dal soaked...70 gram
2. Oil .....2 table spoon
3. Asafoetida..2 pinch
4. Cumin seeds...1|4 tea spoon
5.coriander powder...1 tea spoon
6. Fennel powder...1 1|2  table spoon
7. Red chili powder...1|2  tea spoon
8. Crushed cloves...4
9. Crushed black pepper..10
10. Garam masala...1 tea spoon
11. Ginger powder....1 tea spoon
#  Method Of Making Khasta Kachori.
1.Soak the urad dal for 2 hours or 30 minutes in hot water.
2. Take a big pan or parrant.
Add maida, salt, baking soda and hot Moen ghee or oil. Mix well.
3. Now knead the  semi soft dough with the help of cold normal water. You have to just bind it with light hands.
Don't make it smooth. Cover and  Keep it aside for 20 minutes
4. Meanwhile prepare the stuffing of dal for filling the kachoris...
Place the dal on a sieve for draining the extra water.
5. Heat a pan and add oil.As it heats up, add cumin seeds and asafetida to crackle. Now add all dry masala and saute it.
Then add the sieved urad dal.
Saute it for 5 minutes till a good aroma.
Let it cool.
6. Grind this dal mixture in a mixer jar for 30 seconds only. Just to crush it a little as market style.
Take out it from the mixer jar in a plate or bowl.
7. Now every thing is ready...Dough and stuffing both.
Heat a kadai with oil or deshi ghee on a medium flame.
8. Just grease your hands. Roll it and  divide the dough into 12 portions or as choice.
9. Take a portion or loi. Flat it on the roller board with the help of fingers or on your palm.
Then stuff it with 2 spoon dal mixture.
While stuffing,  press the mixture of dal in the katori of loi and fold it with the help of thumb and finger.
Now make it flat on your palm and press it in the middle with the sides of your palm.
This method of folding kachori... brings a market style texture of kachori.
10. Just prepare like this and fry them on the medium slow flame.
As it becomes fluffy and light brown on the one side, flip them on the other side.
And fry it till golden brown.
While frying 1 batch of kachori on medium slow flame, will take 13 or 15 minutes.
Because these kachoris are thick in texture.
Proper frying will make them crispy from the outside and soft and well cooked from the inner side.
Take out the kachoris in a plate and serve hot with spicy aloo curry, chutney and with tadka raita.
You can also enjoy these kachoris with chai and coffee as snacks either hot or cold.
#  Note....Simple Tips
1.Adding a pinch of baking soda in the kachori dough, makes them fluffy and crispy like halwai or market style.
2. While kneading the dough, just bind it with light hands. Don't make it smooth.
This is a simple technique to make them  crispy.
3. Grind the dal mixture for 30 seconds only. Let it remain whole at the maximum. just bind the all dry spices in the dal.
Don't make a smooth paste of dal.
4. While folding the stuffed kachoris, make a katori of loi then fold it with all sides placing the thumb of left hand in the middle.
Flat it on the palm.
No need of roller pin.Just press the kachori in the middle and transfer it in the hot kadai for frying.
5. Fry them on the medium slow flame.
It will take 13 to 15 minutes in 1 batch of kachori.
6. Moen of hot oil or ghee also makes kachoris crispy like market style kachori.
Thanku Friends,
If you like my recipe, please like and share it.
Thanks again.

Sunday 26 August 2018

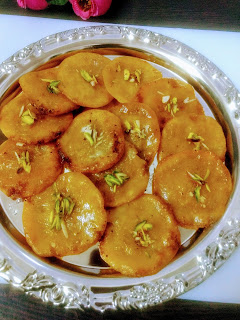
Mawa Malpua With Wheat Flour

To
Hello friends,
Namaskar...
I am Sangeeta Agrawal and heartily welcome you at my blog.
#  Today is a very auspicious day of "Raksha Bandhan".
So Firstly I wish..."A Very Happy Rakhi Festival to All of You".
I impart my special thanks and regards to all my viewers for supporting me.
#  Friends, Mawa Malpua with wheat flour  is a  simple,healthy  and helpful recipe even for beginners.
# Prep Time..10 minutes
# Rest Time....1 hour
# Cook Time..30 minutes
# Pieces...20
# Serving...4
#  So let us see the ingredients for the recipe...
# Ingredients For The "Mawa Malpua"
# For The Dough of Malpua
1. Wheat flour...120 gram
2.Baking powder....1 pinch only
3. Milk......100 ml.
# For The Stuffing
1. Mawa....75 gram
2. Green cardamom...1|4 tea spoon ( 4 pieces )
3. Black cardamom...1|4 tea spoon ( 2 pieces )
#  For The Sugar Syrup...
1. Sugar....200 gram
2. Water....200 ml.
#  For frying Malpua
Deshi Ghee or Butter...200 gram
# For Garnishing Malpuas..
Some finely chopped almonds and pistachios..
# Procedure of Making Mawa Malpua...
1. Firstly, mix the baking powder in the wheat flour and knead the normal soft dough with the help of milk.
Cover it and Let it rest for 1 hour.
2. Now before making the malpua, Prepare the sugar syrup first. So that it cools down a little before dipping the malpuas in it.
Add water and sugar altogether in a pan or kadai. Boil it for 5 minutes while stirring, till sugar dissolves and becomes sticky. Off the flame.
Don't overcook it, for we don't need any strands or tar in the sugar syrup.
3. Now mix the cardamom powder in the mawa and make it smooth for stuffing.
4. Now grease your hands and  roll the dough. Divide it into tiny size balls.
In the same way, divide the stuffing of mawa.
5. Heat a spread bottom pan or tai or non stick tawa with butter on the slow medium flame.
6. Now take a ball of wheat flour dough.
Stuff it with a little mawa and make it flat on your Palm and transfer it to the hot pan.
7. Fry them till golden  brown on the both sides.
It will take only 5 or 6 minutes in 1 batch.
As it cooked, transfer them in the sugar syrup and dip them well with other spatula.
Now Delicious mawa malpuas are ready to serve.
Let it dip in the sugar syrup.
Before serving, take out them and garnish with chopped almonds and pistachios.
Note...
1. Grease your hands, before flatting the malpua so that it could not stick to your palm.
2. Equally stuff the balls with mawa one by one and immediately transfer it to the pan for frying.
Thanku friends,
If you like my recipe, please share it.
Thanks again.

Friday 24 August 2018

Adrak ( Ginger ) Ka Chonka ( A healthy Traditional Recipe )

Hello friends,
Namaskar...
I am sangeeta Agrawal and heartily welcome You at my blog.
# Today I am here with another healthy and tasty recipe of Ginger... That is called "Adrak ka chonka" at my home.
During rainy season, my mother used to make it for us as a side dish.
# This ginger soup is as beneficial in rainy season for digestion as Aam panna is beneficial in the summer to prevent the scorching heat of the Sun.
# Ginger is considered "The chest of medicine" in Ayurveda due to its various benefits. Specially in the rainy season, ginger increases the immunity system and provides relief from stomach cramps.
# Let us see the very simple recipe of ...
Adrak ka chonka..
# Prep Time....10 minutes
# Cook Time ....5 minutes
# Serving...4
#  Ingredients For "Adrak ka Chonka"
1. Adrak ( ginger )....50 gram
2. Sendha salt..1 tea spoon or to taste
3. Black salt...1|4 tea spoon
4. Lemon juice...1 and half lemon
5. Water.....500 ml.
6. Deshi ghee or oil...1|4 tea spoon
7.  Pinch of asafoetida
#  How To Prepare...
1. Firstly, wash and peel the ginger.
Then grate it well.
2. Now add half cup water in the grated ginger and make a coarse paste of it in the mixer jar.
3. Take out the paste of ginger in a big bowl and add rest of the water in it.
4. Now sieve this ginger water in a strainer ( Chalni m chaan lijiye ).
5. Heat a pan with oil or deshi ghee.
Add a pinch of asafoetida to sizzle.
6. Now add  the sieved ginger water in the hot pan by stirring well because ginger paste settles down in the bottom.
6. Let it cook.
As it starts boiling. Cook it 2 minutes more. Add the salt and off the flame.
7. As "Adrak ka chonka" cools down a little, add lemon juice and stir it.
Now Adrak ka chonka or ginger soup is ready to enjoy.
Serve it cold or hot as choice.
Transferring in the fridge,  you can use it 4 or 5 days.
# Note...
1. For getting the maximum juice of ginger, first grate it then grind it.
2. Before serving this ginger  chonka...Stir it well because it settlles down in the bottom.
Thanku  Friends,
If you like my recipe, then share and subscribe it.
Thanks again.

Wednesday 22 August 2018

Malpua With Curd ( Traditional Recipe of Malpua with home ingredients )

Hello friends,
Namaskar...
I am sangeeta Agrawal and heartily welcome you at my blog.
#  Friends, now a days festival season is going on..And " Raksha Bandhan" is about to come...So you can try this simple, different but very luscious recipe of malpua at home.
# You can prepare these tasty malpuas with home ingredients only.
# Ingredients For The Batter of  Malpua...
1. All Purpose Flour....1 cup ( 100 gram )
2. Semolina.....1|2 cup ( 50 gram )
3. Curd or yogurt.....2 cups (200 gram )
4. Hot water or hot milk ...1|2 cup or as needed
5. Deshi ghee for frying
# Ingredients For The Sugar Syrup
1. Sugar....250 gram
2. Water......250 ml.
3.Green cardamom powder...1|2 tea spoon
4. Some chopped almonds and pistachios for garnishing the malpuas...
# Method Of Making Malpua...
1. Firstly prepare the sugar syrup by boiling sugar and water together till it takes sticky consistency of thin sugar syrup.
Just boil it for 5 minutes only. No need of any strands or tar for chasni.
2. Mix well all purpose flour ( maida ) and semolina with curd.
Let it rest for 6 to 8 hours for the fermentation ( Khameer ) or 2 hours in the sun.
3. Then beat well and add hot water or milk to adjust the thick pouring consistency of malpua batter.
4. Heat a spread bottom pan or tai with ghee on medium slow flame.
5.  Pour a little batter in the ghee with the help of flat spoon. It will take its  round shape by itself.
In this way you can make 3 or 4 malpua in one batch.
6 While frying, flip the ghee over the upper side of malpua for frying and cooking well.
As it becomes golden brown from the sides, now flip them to the other side to cook.
As malpuas are soft in texture, so take the help of other spatula to flip them.
One  batch of  malpua will take 8 minutes to cook well.
7. As you fry them, just transfer in the sugar syrup and dip them.
Now delicious malpuas are ready to serve.
Take out the malpua from the sugar syrup and serve cold or hot.
Garnish them with chopped almonds and pistachios.
Note....
1. If you want the instant malpua of curd, then add 1|2tea spoon baking powder in the batter of malpua.
2. Adjust the consistency of batter by adding hot water or maida.
First test the batter by pouring a little portion in the hot oil.
If it is too thick, then add a little water.
If it too thin and is not taking a proper shape, then add a little maida or all purpose flour in it.
Thanku Friends,
If you like my recipe, please share your experience with me .
Thanks again.